Friday, June 29

disBigGive Shirt and Bag

I was able to participate in another disBigGive project where we make and send items that a Make A Wish family can use/wear on their wish trips.

Here is the survivor shirt for the little girl and a bag for mom to carry in the park on their trip to Disney. The t-shirt design is all my creation with a princess iron-on purchased off e-bay. I chose it because all the princesses are dressed in gold and gold is the color for childhood cancer awareness. Gabby is a cancer survivor so this was perfect for her shirt. The back of the shirt has a gold felt ribbon with black felt mickey ears and iron on felt letters.


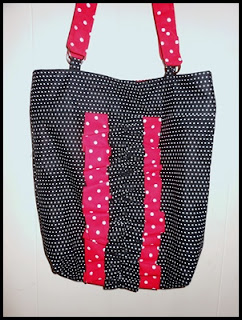
The bag was made using a tutorial found on pinterest which led to the blog Mommy by day, Crafter by night. The tutorial is so easy to follow and I have made 2 bags from it. You can find it here: TUTORIAL 

 I chose fabrics that had a few of the traditional disney colors of black and red..but not necessarily disney themed. So mom has a bag that she can use on their trip and after. I love how it turned out. :)


Saturday, June 16

Star Wars R2D2 Mickey Mini Backpack


I signed up for another disBigGive in which I make something special for a Make A Wish kid and their family to take with them on their wish trip to Walt Disney World. The wish kiddo LOVES Star Wars so I wanted to make a special mini bag for him to carry the normal theme park necessities for the days at the park. 

Materials:

--small blue quilted mini backpack found at Hobby Lobby $5.99
--google images of mickey head and R2D2 (I did find an image of a R2D2 Mickey Ears sold in the parks that I used for parts placement)
--google image of Star Wars logo
--HeatBond ultrahold no sew
--felt pieces in black, white, light blue, grey, red, yellow
--freezer paper for appliques


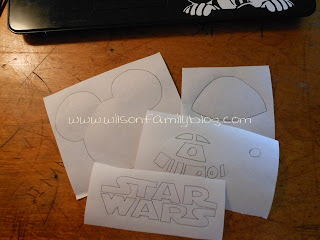
Using the google images of a mickey head I printed, I traced out the applique pieces onto freezer paper--the mickey head and the Star Wars Logo. I hand drew out the grey area for R2D2 and all the mechanical R2 pieces using a google image as inspiration. I am using the freezer paper applique tutorial found at Little Birdie Secrets.


Iron on the freezer paper appliques to your felt pieces--using google image as inspiration for colors and placements. Make sure you check your iron settings so you don't melt the felt.


Once your freezer paper pieces are ironed onto your felt, then iron on the HeatnBond to the back of felt. Once again--check iron settings.


Cut out all your felt pieces--the mickey head, grey R2 body, all the small blue buttons and such, Star Wars logo.


Do a dry run of the placement of the mechanical parts of R2--figuring out how you want to place them.


The start peeling off the freezer paper and cover sheet of the heatnbond. Iron 1 piece at a time--**check iron settings--felt will melt**


Once the R2 body piece is finished, iron it onto the mickey head and iron on to bag.


Do the same steps as above for the Star Wars Logo. Once I cut out the yellow piece I ironed it onto a black piece, added some heatnbond to back of black piece and cut around the yellow leaving a small amount of black to outline. I then attached it to the bag. Placement on the bag is up to you. I put the Mickey Head R2D2 on the flap and the Star Wars logo on the body.


When ironing on the final pieces--make sure to have something very firm underneath--I used a book and iron very good around the edges.


Hope you liked this tutorial!! Have fun making one for your StarWars/Disney fan. :)

Thursday, April 26

Happiest Bathroom Decor on Earth


Came across this new line of Disney themed bathroom decor. I think yes for the 2nd bathroom.I especially love the mickey head rug. :)

Wednesday, April 25

Spring Gardening

Gardening is going well in our backyard. This is a pic of Trace's science experiment. The tomato plant on the right was planted in dirt dug out of the yard. The tomato plant on the left was planted with compost, fertilizer and vermiculite. Sun exposure and water schedule are the same.

Square foot gardening with tomatos and peppers.
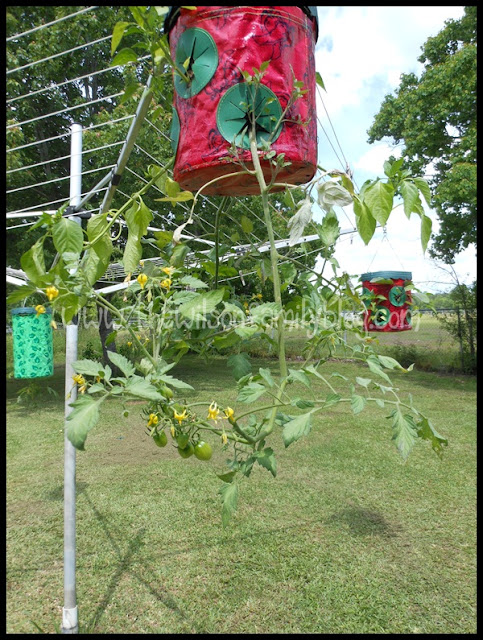
Yummy grape tomatoes in a hanging planter. Lots of blooms and fruit.

More hanging planters with tomatoes and peppers.
Fig tree that was rescued. Was just a stick with a couple of leaves.

Clover


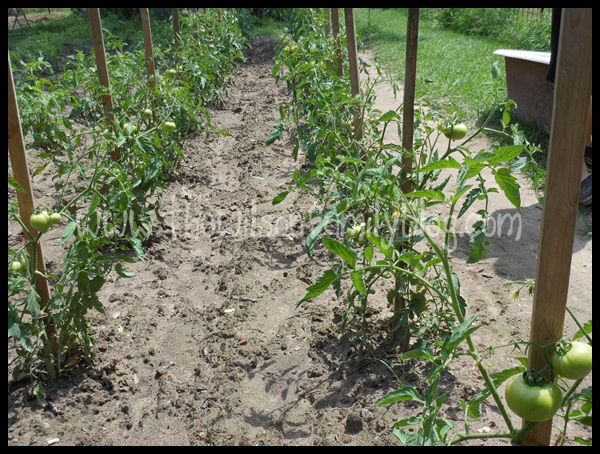
Rows of tomatoes


Muscadine vines and growing everywhere

Thursday, February 9

disBigGive--Disney Park Bags

I had so much fun making these items for a family going on their daughter's Make A Wish trip. K is a two-time cancer survivor!! I designed a shirt to show that and her love of Disney. I found an iron-on on eBay that was the disney princesses dressed in gold! How perfect to represent childhood cancer awareness. On the back I put a large gold ribbon with mouse ears. I LOVE the way it turned out. 


Next was a bag for mom. We have been to Disney several times and I know how important a good bag is for the trip. Not too big, not too small. Just big enough to carry the necessities of theme park navigation.
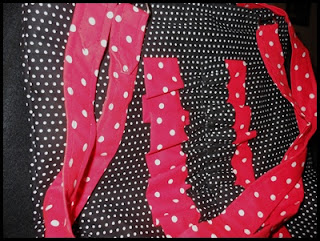
I love the way this turned out with the red and black with white polka dots. And ruffles!!


Last was a cute little bag for a sweet little girl that had beat cancer TWICE!! A perfect crossbody hot pink with black peace mouse ears design. I think she will love it!


Happy Disney Wishes!!

Credits:
Bag design and tutorial found here: Mommy by day...Crafter by night
Mouse Head Peace Sign template found here: etsykim
Hot Pink Felt Crossbody bag: Hobby Lobby
Letters: Iron on set from Hobby Lobby
Hand cut black felt flowers, white buttons and thread


Tuesday, January 17

LEGO heart necklace--Pinterest inspired

Trace is a LEGO addict!! 


He loves all things LEGO including sets such as Harry Potter and Star Wars and the Wii games such as LEGO Indiana Jones.


So when I came across this pin on Pinterest...

which leads you to an etsy shop: MoL Gifts


I just knew they would be perfect for Trace to give his sisters for Christmas. 

Being the crafty person that I am and knowing there were hundreds thousands of LEGO pieces in Trace's bedroom and the fact that I had lots of jewelry scraps, we decided to try and make them.

After several hours of digging through rubbermaid tubs of LEGOs, no red square pieces with the holes like those in the above pic were found. Next stop...eBay. :)

I ordered the ones I needed and with Trace's supervision we quickly assembled about 5 necklaces.

Materials: 
--2 Square Lego Pieces with rounded edge and holes (*sorry, I don't know the proper LEGO term)
--silver chain
--jump rings

Step 1: measure the length of chain you prefer.
Step 2: attach jump rings to each end of chain and to holes on LEGO pieces
Step 3: connect jump rings on ends of chain to jump rings on LEGO pieces

Note: I didn't put a connecter on the chain as the LEGO pieces come apart and we used that as the connectors to put on the necklace.

 Quick and easy!!


And they loved them. :)